This week has been just fantastic--the weather has been gorgeous and so fall-y, my lessons have been successful, and the days have been flying by. My plans for last night fell through, and though that was really disappointing, I think it was a blessing in disguise. I was able to clean my room (which was beginning to look like a clothes tornado had hit), get in some good reading of A Long Way Gone (check out guidelines for the blog book discussion here--the date has been pushed back to Mon, Oct 10), and get to bed at a decent hour!
Today I bring you Student Teaching Guest Post #8 by the ever cute blog-friend-turned-real-life-friend Claire! Enjoy!
Hey y'all! This is Claire from Life in the Sweet Virginia Breeze! You may remember me from a few posts here... Allie and I knew each other indirectly through "The Cuties". I taught the Cuties how to swim! I would run into Allie on and off at the pool, and one day our blogs crossed paths. You could definitely say the rest is history! I am so thankful for the real life friendship we have developed. We try to see each other on the reg and always have such a good time. And I hope so so so much that we can have a Bryce and Mr. C double date soon! I was so honored when Allie asked me to guest post! Let's just keep the fact that she asked me weeks ago via email and I forgot to respond on the DL and pretend it just happened recently when she texted me one night. Moving on... One day this summer I was sitting at the pool when I noticed a girl near me working on a needlepoint belt. Now, many of y'all have already heard what type of belt she was making so I won't repeat it... okay I will, it was a beer label needlepoint belt. Yuck. To each his (or her) own, I guess.
So I got this fabulous idea!
I'm going to make a needlepoint belt!
I decided my first endeavor into the needlepoint realm would be a belt for my beau, Mr. C. Before I met Mr. C, he was in the First Infantry Division of the Army. This is most commonly referred to as "the big red one". I contacted a family friend who I knew could design a custom needlepoint belt for Mr. C and a couple weeks later I picked up the most perfectly crafted belt.
I'm still in the process of needlepointing, and when I'm finished I can take it in to be put on an actual belt! I thought this would be a perfect thing to share with y'all! I recommend it to anyone. It's super easy and very relaxing! Here are a few pics and tips:
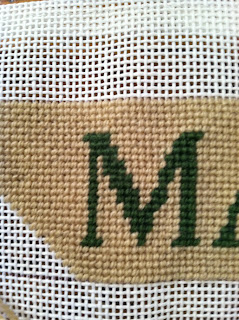
 Above: Mr. C's belt has his initials on one end. I started with these and worked my way left across the belt.
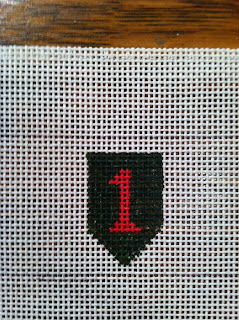
 Here is a close-up of "the big red one". I unknowingly picked just about the most perfect design to start with as a beginner. It's so simple- only 3 colors total. And it repeats, so nothing is a surprise!
Left: A close-up of all the big red ones (albeit upside down- sorry!)
Now for some quick tips if you're interested in needlepointing your very own belt!
1. Although I had a family friend design mine, custom designs and even pre-set designs are available at any local needlepoint shop! I stopped in Jermie's, the shop where Allie and I live. The ladies were super helpful! They even taught me how to needlepoint and gave me instructions because I didn't know how to needlepoint the day I walked in the store!
2. Don't be afraid to ask questions! Luckily, my mom also knew how to needlepoint, so I felt a little less embarrassed asking her silly questions. And be sure to ask the ladies at your store about the proper thread to use, etc.
3. Buy a needle threader! This is seriously the best tool ever invented! And be sure to buy extra needles because they break easily.
4. Sometimes when I pull the thread through, it snags or tangles. Be patient. Sometimes I have to cut the thread and start over, and the best trick for me is to let the needle hang and unwind itself before going on.
5. Work under good light. I've found that when I sit under our floor lamp I work best. Sitting in front of the television is not always the best idea either because I get easily distracted looking back and forth between the two.
6. Lastly, don't be afraid to try something new! I had no idea what I was doing when I started, and this is by far the best thing I've ever made!
Mr. C and I live together, so although this is his Christmas present I've had to tell him about it. Putting the needlepoint on the actual belt can take 4-6 weeks, so there was no hiding it this late in the game. Even though there's no surprise, I can tell he's still happy to be receiving something I've made and that he can wear proudly.
That's all for now! I hope y'all enjoyed my little guest post, and don't be a stranger to my blog- which you can find here. Feel free to ask me additional questions too if you're interested in beginning your own needlepoint!
Don't you think that's a unique and thoughtful gift? Bryce has been asking me if I'd make him one--I haven't made any promises, but Claire's tips do make it sound like an endeavor that's not too difficult and is also fun!
Have a great day!


